On the top left of the Prophet main menu is the file menu. On it is import data. This is where you deal with Hoseasons data, Sun Group4 information, and any regular bulk import of data to the system.
As there are many parts of this form to set up, and if used, is used regularly, the system remembers the settings on this form.
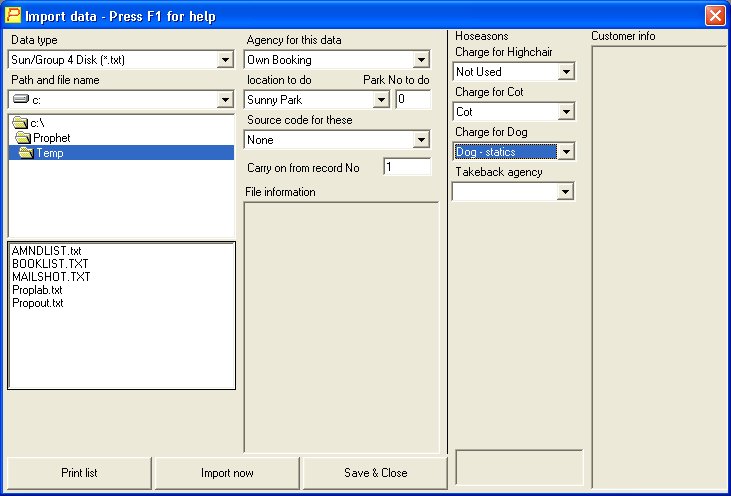
To use this form, first select the type of data you are going to import. Pick one of the types from the Data type pulldown menu.
Select the drive, folder ( directory ), and file name of the data file you are going to import.
You will see in the file information box, details about the file you’ve just selected. If the system cannot read the file, or it seems incorrect in some way, you will see a message here telling you so.
For booking import, select the agency, and location. For Sun Group 4 disks, you will also need to select the Park No to do, which should be either be written on the disk from Sun Group 4, or given to you by them. Sun Group 4 data can contain more than one park’s data, and each park has to be done separately from the same file.
For Hoseasons import, select the extras in the system that are for highchair, cot and dog. If you don’t have arrangements for Hoseasons to book these, then leave them on not used. Also select the agency you’ve created for Takebacks, ideally this should be separate from Hoseasons or Own booking, as this makes them easier to keep track of, and easier to select together in booking list for instance when you need to work out commission etc.
Before importing the data is it wise to print a list, this will enable you to more easily keep track of what number you have got up to if you are interrupted and need to cancel this form and do something else. Click Print list.
To carry on from where you left off, re-select the file you were working on, and change the input Carry on from record no. to the next one on your list.
Click Import now to begin importing. The system moves this form to the right hand edge of the screen to enable you to see the data that is being read from the file.
The system tries to find the customer in the normal way by using find customer or booking information. If found, you need to select that customer, then click save. If not, select new customer, see Find customer or booking information, page 7. All the customer’s details are present, and all you need do is click save.
In the case of enquiry data, you then Close, and the system moves on to the next one.
In the case of booking data, you then need to click on new booking. The system takes you to the booking form, where all the details, arrival, departure, unit etc are present. You need to click Calculate charges, put on any money, then click save. The system then moves on to the next one.
There is also a tickbox, Automatic import, for enquiry data only. This does not confirm every new address going in to the system, but it does search for existing customers, so it will try and avoid duplicates. This option must be used carefully, it is recommended you take a backup before using this option.